Thursday, November 7, 2013

No-Bake Chocolate Oatmeal Cookies

I never knew it was possible to make cookies without baking them. 

I just remembered seeing a recipe for no-bake goodies before because of the past Halloween season, and I thought, I needed something quick, healthy, and delicious for my daughter's school snacks tomorrow.

So browsing the web I went.

Thanks to Betty Crocker's inspiration, I now have my own no-bake chocolate oatmeal cookie recipe with less sugar and more coconut oil goodness.

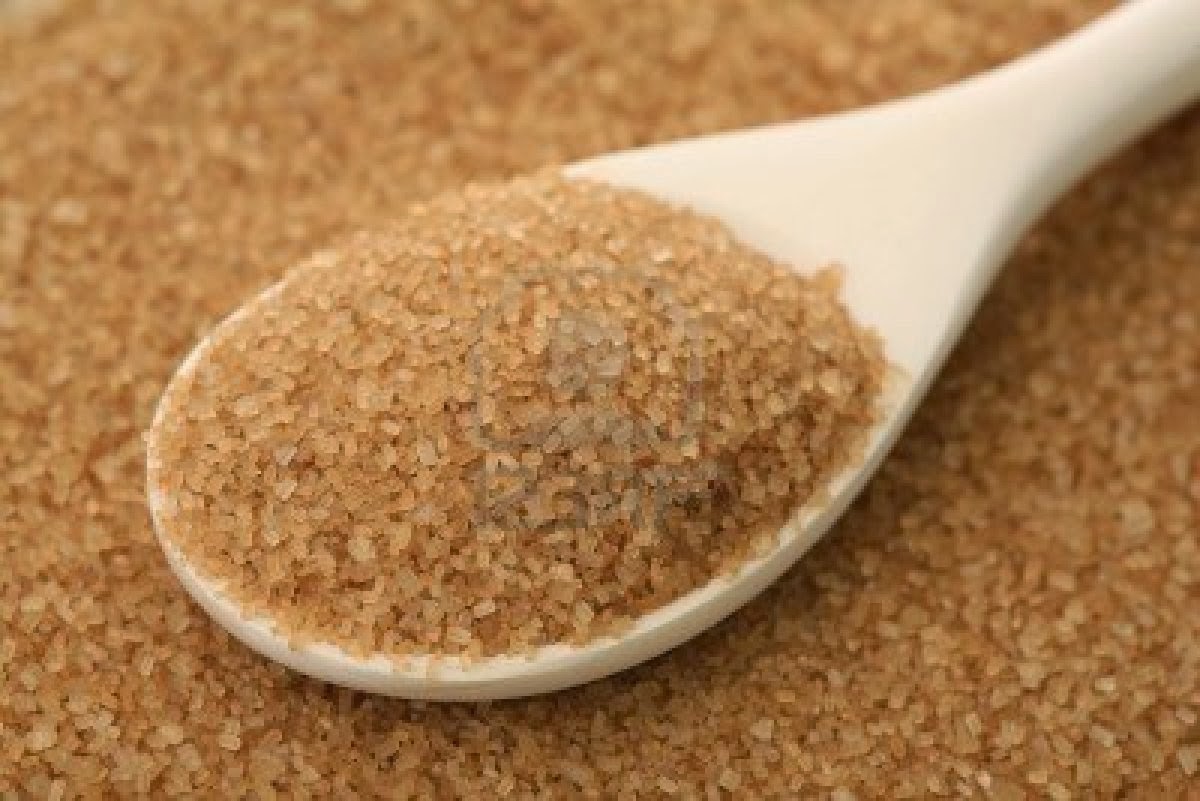
I don't like my cookies too sweet so I made changes in her recipe. I used only a cup of brown sugar, instead of two. 

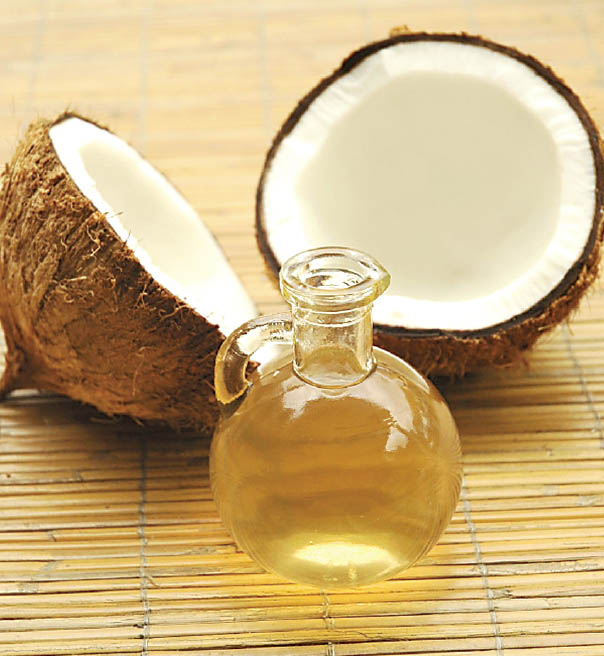
I also used coconut oil because it tastes good with chocolate and I love it for its health benefits. It also replaces the need for butter. But I know there's a grass-fed butter revolution going on, so you can use butter as you wish.

I also know that 1/4 cup of butter (in usual no-bake oatmeal recipes) means 8 tablespoons of butter or oil, but 4 tablespoons of coconut oil worked fine for me. You can make it 8 tablespoons of oil if you want. 

Ingredients

  • 1 cup brown sugar
  • 1/2 cup unsweetened cocoa
  • 4 tablespoons virgin coconut oil
  • 1 teaspoon vanilla
  • 1/2 cup fresh milk
  • 3 cups quick-cooking oatmeal

Instructions

1) Combine sugar, cocoa, oil and milk in a saucepan. Boil for a minute in medium heat or until everything is fully dissolved.

2) Remove from heat and add oatmeal and vanilla. Stir well.

3) Put spoonfuls on a plate and let it cool. 

No-Bake Deliciousness

Easy, practical, delicious no-bake cookies! Healthy too!

They're not just as solid as other baked cookies though. 

They're more like soft, chewy cookie goodness.

My kids and husband love these No-Bake Chocolate Oatmeal Cookies and I make them regularly nowadays. I can't wait to try other no-bake goodies. 

Practicality is simplicity after all, and no-bake is pretty and sweetly simple enough for me.

What's your idea of a healthy no-bake cookie? 


Sunday, October 20, 2013

Why Oil Pulling Should Be A Part Of Your Daily Routine: Benefits Of Oil Pulling

Don't pull legs to have an impact on people. Pull oil instead!

Oil pulling is the process of swishing vegetable-based oil in your mouth for 15 to 20 minutes. It is more than just a passing fad because it has been practiced as an Ayurvedic body-detoxifying therapy for thousands of years.  


Oil pulling can have a number of surprising benefits for those not familiar with it. I have personally tried it and I have experienced several dental and health benefits. 


benefits of oil pulling
The Benefits of Oil Pulling
Photo credit: First Descents Organization

Benefits of Oil Pulling

One of the direct benefits of oil pulling is the improvement of dental health. The benefits of oil pulling, however, can go beyond dental health because it may even improve overall health. 

Most of the evidence presented here to support oil pulling's advantages are anecdotal, or from the testimonies of others, though some doctors  and studies support the various positive effects of oil pulling.

Dental Health Benefits


  1. Less sensitive teeth. Oil pulling can decrease the sensitivity of your teeth by reducing plaque that causes tooth decay and by restoring the natural ph levels of your mouth. On ph levels: "When the mouth pH is 7.1 or higher, there is no tooth decay. Corresponding to the healthier mouth environment, not conducive to tooth decay, is a lesser number of bacteria in the mouth."
  2. Whiter teeth. Testimonials, such as from Dr. Mercola and Wellness Mama, show that oil pulling has whitened their teeth. A more specific and direct explanation for the teeth-whitening effect of oil pulling remains under-researched, however. 
  3. Stronger gums. Oil pulling can improve the health of your gums through curbing bacterial growth that can weaken it.
  4. Reduces plaque. Several types of vegetable oil (such as coconut oil) have antibacterial properties that can kill bacteria which cause plaque buildup.
  5. Cure gingivitis. Strengthening gums and teeth through oil pulling can cure gingivitis.

Other Health Benefits

  1. Detoxifies the body. Oil pulling can clean the body's toxins. Dr. Bruce Fife offers an interesting metaphor for oil pulling: "The oil acts like a cleanser. When you put it in your mouth and work it around your teeth and gums it 'pulls' out bacteria and other debris. It acts much like the oil you put in your car engine. The oil picks up dirt and grime. When you drain the oil, it pulls out the dirt and grime with it, leaving the engine relatively clean. Consequently, the engine runs smoother and lasts longer. Likewise, when we expel harmful substances from our bodies our health is improved and we run smoother and last longer."
  2. Alleviates pain and other symptoms related to several illnesses. Some sources showed that oil pulling can alleviate pain and other symptoms related to asthma, allergies, chronic fatigue, diabetes, migraine headaches, PMS, and chronic skin problems, among other illnesses. A possible explanation is that when the body is cleansed through oil pulling, bacterial and stress-related causes of these illnesses may be removed.

How to do Oil Pulling

Ingredient:

Any type of vegetable oil: Sunflower and sesame seed oils are some of the most widely used oils for oil pulling, but some people prefer olive, coconut, almond, and other oils. 

Note: I prefer virgin coconut oil because it is a local Philippine product and cheaper and more accessible than sunflower and sesame seed oil. I like the taste of virgin coconut oil better than other oils too. Also, virgin coconut oil has antibacterial, anti-inflammatory, and anti-fungal benefits.

Instructions: How to do Oil Pulling
  1. Use 1 to 2 teaspoons of oil.
  2. Swish the oil around your mouth for 15 to 20 minutes. The duration of oil pulling is important because it takes 15 to 20 minutes for the oil to break plaque and bacteria, but not long enough for them to be re-absorbed into the mouth. Do not swallow or gargle the oil because it is full of toxins and bacteria. Swish the oil, pulling from and drawing it to your teeth, tongue, and gums. 
  3. Spit the oil after into your trash can or outside (soil in your garden) to avoid clogging sinks or drains, especially when you live in areas with cold climates. 
  4. Rinse with warm water very well. You can brush your teeth after oil pulling too if you want.

Best Time for Oil Pulling

According to Dr. Fife, oil pulling is best done before eating or drinking anytime of the day. It can be done once or thrice a day on an empty stomach.

Passing Time: Twenty-Minute Habits

Multitaskers might have a hard time accepting that 20 minutes of mere oil swishing is worth it. On my part, I do something else while oil pulling. Some suggested activities are:
  • Oil pulling while watching the news.
  • Oil pulling while preparing food.
  • Oil pulling while taking a shower.
  • Oil pulling while reading news online.
  • Oil pulling while reading and commenting to news feeds in G+, Facebook, Twitter and the like.
  • Oil pulling while doing research for our blogs.
When oil pulling is done with other activities, time will fly faster. 

Some Possible Initial Side Effects

Dr. Fife and some testimonials say that they have experienced these side effects:
  • mild congestion
  • headache
  • mucus drainage 
Dr. Fife explains that these effects may be some of the initial effects of detoxification: "These symptoms will subside as your body becomes cleaner and you become more comfortable with oil pulling."

I have actually experienced a slight headache during my first oil pulling, but I no longer experience it. Some family members have allergies, so they experienced mucus buildup during oil pulling, but these effects subsided after continued use. They attest that they experience fewer symptoms of their allergies when oil pulling.

Oil Pulling: Swishing towards Health and Confidence

Oil pulling is now a part of my morning routine, especially since my mother already knows how to make coconut oil, and I'm feeling the benefits of oil pulling.

Pull oil, not legs, and the impact is the same- a better effect on people you are talking with because of the confidence and good feeling that come from a bright smile, fresh breath, and detoxified body.

Have you tried oil pulling? What do you do to kill time while killing bacteria and toxins through oil pulling?

Monday, October 14, 2013

Reflexology: Quack or Smack On?

Your health is in your hands, I mean, your feet.

Whether you are an athlete suffering from muscle pain because of a good run, or an individual who feels the burn of a high-intensity cardio workout or lower body pains from an awesome leg/thigh exercises, or someone in pain because of various illnesses, reflexology might help you deal with the pain. 

Reflexology is basically about applying pressure on certain parts of the feet that are connected to a body organ in pain. Massaging these parts are believed to reduce stress and pain by balancing energy levels.


People who grew up drinking medicine tend to be wary when they hear alternative medicine. For them, reflexology, acupuncture and the like smell as fishy as a quack doctor. 

But if you want to try a different therapy, something easy to do, and at the same time, something that may provide immediate benefits, if not long-term when continued, reflexology can offer something for everyone in pain.

Reflexology: Pressure that Ends Pain 

Reflexology is "the application of appropriate pressure to specific points and areas on the feet, hands, or ears." 

Reflexologists assert that these areas and reflex points are connected to different body organs and systems, and pressing or rubbing them can have a positive effect on that organ, as well as the individual's general health (1). The positive effect may be alleviation of pain or curing of that illness (2).

Another simple explanation of the impact of reflexology is that for those who feel pain in different parts of their body, pressure on those reflex points can relieve their pain. If you look at the reflexology chart below, number 1 refer to the sinus, so if you have sinusitis, massaging those places can help relieve it.

Reflexology is not officially recognized as an acceptable medical procedure for diagnosing or curing health problems, but millions of people use it because it helps them treat their illnesses, or it complements other medications or other set of alternative therapies, such as acupressure and acupuncture (3).

Several studies showed that reflexology can treat pain and anxiety that go with these health conditions: asthma (4), cancer (5), cardiovascular issues (6), diabetes (7), headaches (8), kidney function (9), PMS (10), and sinusitis (11). See also the Howcast video below for relieving pain from menstrual cramps.

Reflexology Quack or Smack On
Reflexology Chart: Health in Terms of Feet
How to Relieve PMS and Menstrual Cramps through Reflexology

Reflexology Points and Areas

Maps of reflex points are used by practitioners all over the world, but not all of them agree on the exact location of every point (12). General agreement has been established, nonetheless, on primary reflex points (13).

Reflexology charts or reflexology maps are representations of the human body. Each foot refers to the "vertical half of the body" (14). The left foot stands for the left side of the body, while the right foot refers to the right side of the body. 

Some reflexologists massage the hands or ears too. Though they may have different approaches, their main goal is to release the stress from the nervous system and to balance energy levels (15).

Take Caution

You do have to be mindful of your health conditions before trying reflexology. For example, reflexology may not be advisable for you, if you have diabetes and you're just healing from wounds and gout flares.

You also have to be cautious if you're pregnant or breastfeeding. If you have severe vascular disease of the legs or feet or heart conditions, reflexology may not be advisable for you. Though some people with heart conditions might claim that reflexology helped them, it's not always something that safely and effectively applies to everyone. 

In other words, like pharmaceutical medicine, reflexology has its limits and it may have drawbacks for certain people.

Reflexology: Quack or Smack On?

I'm not claiming that reflexology is the best and only treatment for you. I'm just offering an alternative. Something else that you can do on your own or ask others to do for your without popping pills.

I honestly prefer alternative therapies and food as medicine compared to drinking pharmaceutical drugs. I don't have any serious illness though so my case is different. 

What is quack to others might be smack on effective for you.

All I know is that I hope that if you try reflexology for your different health needs, it will work for you, so you don't have to drink pain or anxiety medications.

All I know is that our body can heal itself. That we can manage our own pain. 

All I know is that your foot is your health too. 

What alternative therapies have you tried when treating pain and other illnesses? Did they work or they worked only in combination with other therapies or medicine?

References

1) Teagarden, K. (n.d.). "Reflexology." University of Minnesota. Retrieved from http://www.takingcharge.csh.umn.edu/explore-healing-practices/reflexology

2) Ibid.

3) Ibid.

4) Ng,T.P., Wong, M.L., Hong, C.Y., Koh, K.T.C., & Goh, L.G. (2003). The use of complementary and alternative medicine by asthma patients. QJM, 96(10), 747-754. Retrieved from http://qjmed.oxfordjournals.org/content/96/10/747.short

5) Stephenson, N.L., Weinrich, S.P., & Tavakoli, A.S. (2000). The effects of foot reflexology on anxiety and pain in patients with breast and lung cancer. Oncology Nursing Forum, 27(1), 67-72. Retrieved from http://www.ncbi.nlm.nih.gov/pubmed/10660924

Hodgson, H. (2000). Does reflexology impact on cancer patients' quality of life? Nursing Standard, 14(31), 33-38. Retrieved from http://europepmc.org/abstract/MED/11973949/reload=0;jsessionid=54sj8hr5Y8m5IIy0OIRE.40

6)  Padial, E.R.,  López, N.T.,  Bujaldón, J.L., Villanueva, I.E., & del Paso, G.R. (2012). Cardiovascular effects of reflexology in healthy individuals: Evidence for a specific increase in blood pressure. Alternative Medicine Studies. Retrieved from http://www.pagepress.org/journals/index.php/ams/article/view/3589

7) Ulbricht, C. (2009). Diabetes: An integrative approach: a natural standard monograph.  Alternative & Complementary Therapies, 15 (6), 311.

8) Stone, P.S. (20110. Reflexology & headaches: Opening the door to relief. Massage & Bodywork, 26(4), 34.

9) Markell, M.S. (2005). Potential benefits of complementary medicine modalities in patients with chronic kidney disease. Advances in Chronic Kidney Disease, 12(3), 292–299. Retrieved from http://www.sciencedirect.com/science/article/pii/S1548559505000704

10) Steiner, M. (2000). Premenstrual syndrome and premenstrual dysphoric disorder: guidelines for management. Journal of Psychiatry and Neuroscience, 25(5): 459–468.

11) Gunter, A., Van Eeden, V., & De Jager, L. (2007). Reflexology versus reflexology and colour therapy combined for treating chronic sinusitis. Interim : Interdisciplinary Journal, 6(1), 24-36.

12) Teagarden

13) Ibid.

14) Ibid.

15) Ibid.

Sunday, October 13, 2013

Homemade Remineralizing Toothpaste

If I tell you that there's a possibility that a combination of the right nutrition and the right remineralizing toothpaste can cure your tooth decay by initiating a self-repair process for your teeth, would you believe it?

I was skeptical at first. I already have a couple of pasta-filled teeth, so in my mind I was thinking, well, how controversial is that! A tooth-cavity-busting-teeth-healing toothpaste for real? 

I mean, if you have a tooth cavity already, some dentists would immediately recommend pasta-filling. Drill the tooth, fill it with pasta, and there you have it, a repaired tooth that would need refilling every now and then. 

That's how it's done. That's how people usually fix decaying teeth. That's how I knew it could only be done.

Apparently, I was so wrong. It is possible for our teeth to repair itself.

For the past fifteen years, studies, such as from Kaufman et al. (1999), Munoz et al. (1999), Zhang et al. (2007) and Fowler et al. (2006), are showing positive benefits from using remineralizing toothpaste. These benefits include rehardening broken or damaged enamel and decreasing tooth sensitivity to acidic products. 

If you want to read more on the process of remineralizing teeth, continue with this article, or you can go ahead to the Homemade Remineralizing Toothpaste recipe below because you already believe that we can self-heal many of our illnesses through a healthy diet and using natural products. 

Also, to read more about homemade toothpaste's benefits, and why commercial toothpaste may actually be bad for you, you can read "Commercial Toothpaste's Ingredients: Are They Safe?" from my post "Three Easy Steps for Baking Soda Toothpaste (Safe for Kids)"

Remineralizing: Activating the Ability of Your Teeth to Self-Heal Tooth Decay


Remineralizing our teeth is the process of delivering calcium and phosphate ions to the teeth, where these ions, in turn, can rebuild enamel through remineralizing the teeth. 

Remineralizing, with its ability to deliver natural tooth-building ingredients to our teeth, can activate their natural self-repair process. 

Sounds freaky? It's not if you think that it's possible for our bodies to self-heal with the right mindset, diet, lifestyle, and natural products.

For me, remineralizing offers a natural way of curing dental cavities. It's our teeth rebuilding itself with the right tools.

Homemade Remineralizing Toothpaste

I used the recipe for our homemade remineralizing toothpaste from Wellness Mama, being a fan of Katie and all that, and because I find her recipe very easy to make. 


Ingredients for homemade remineralizing toothpaste

Ingredients

  • 5 parts Calcium powder or Calcium Magnesium Powder
  • 2 parts Baking Soda
  • 3-5 parts virgin coconut oil to achieved the desired consistency and texture
Note: By 5 parts, you can refer to it as 5 tablespoons or teaspoons as you wish. You can try coconut oil (the one used for cooking), though I've personally used only virgin coconut oil. You can also just make fresh small batches to use for the day and combine the mentioned ingredients according to the consistency you want. 

Optional Ingredients

  • 3 parts Xylitol Powder (Note: You may want to include this though because the study of Sano et al. in 2007 showed that xylitol helped enhance the remineralizing process).
  • Essential oils for flavor (mint, cinnamon, and orange are all good), Grapefruit Seed Extract, Myrrh and Trace Minerals (Note: I used 5 drops of Peppermint oil. Be careful of using essential oils when nursing and when pregnant though. You have to do research/consult health professionals on these essential oils that may not be good for nursing/pregnant mommies).

How to Make Homemade Remineralizing Toothpaste

1. Mix all calcium powder, baking soda, and xylitol (if using) well in a bowl. I crushed the calcium tablets we have. I did not use xylitol because I don't have it on my end.

2. Add coconut oil slowly so that you can easily manage the process of getting the right consistency.

3. Include any optional ingredients, such as essential oils.

4. Keep your homemade remineralizing toothpaste in a small container. You can use a clean spoon to scoop it out, especially when the oil has hardened.

Eight Exciting Benefits Of Making Your Own Remineralizing Toothpaste

Eight Exciting Benefits Of Making Your Own Remineralizing Toothpaste

These are the benefits of remineralizing toothpaste according to my experience and some anecdotal and scientific studies:

1) Cleans and whitens teeth better than commercial toothpaste brands.
2) Freshens breath.
3) Decreases teeth sensitivity to coldness.
4) Protects our teeth from acidic products like soft drinks.
5) Reduces plaque.
6) Cures toothache. In my case, I have this tooth ache from tooth decay, but since I've been using my homemade remineralizing toothpaste, the pain is gone.
7) Heals tooth decay.
8) Gives an opportunity for great family bonding time. If you make your homemade remineralizing toothpaste with your kids, they'll have fun making it (at least in my case) and they'll have fun in actually using it too, even if baking soda tastes salty. Let's call that pride in DIY.

My daughter prefers our homemade toothpaste because she dislikes the strong mint taste of commercial toothpaste.

I also made this with my sis-in-law +Hennidyn Portem and it was so much fun pounding and mixing stuff :D


children helping parents in preparing ingredients for homemade toothpaste
My five-year-old helping mama make our homemade remineralizing toothpaste

The Downsides and Limitations of Homemade Remineralizing Toothpaste

1) It does not have the smooth, foamy feeling like other toothpastes do. If you want some bubble action, you can add one part of natural castile soap to it, which Wellness Mama used in her previous toothpaste recipe.

2) It does not automatically cure tooth decay if you don't change your eating and dental hygiene habits. It means that it won't work if you don't brush at least twice a day and you eat too many sweet/acidic food products daily.

Why Baking Soda?
Contrary to (somewhat) popular (mis)belief, baking soda does not erode tooth enamel, according to the study of Menezes et al. (2004). 

Baking soda can also be used to effectively deliver calcium and phosphate ions to our teeth, which is what remineralizing toothpaste exactly aims to do. 

Furthermore, baking soda, based on my experience and anecdotal evidence, can clean teeth better and freshen breath than commercial toothpaste brands and can result to strong, white, healthy teeth and gums because it can effectively remove plaque.

Finally, baking soda has no fluoride, so it's safe for babies and young kids. Although  for my toddler, I just use virgin coconut oil as his toothpaste (it has antibacterial, antiviral, and anti-inflammatory properties) because he does not like baking soda's salty taste.

Expiration Date

Based on users' comments from Wellness Mama, our homemade remineralizing toothpaste can last for six months, although it will be consumed much faster for large households. Probably because of the heat in the Philippines, I noticed that mine lasted for two months only. So if it's pretty hot in your area, I think it's best to make small batches. 

Where's the Fluoride?


Well, I am sure my dentist will hate me for saying this, but fluoride is not exactly needed to have clean and healthy teeth and gums. I will make a separate blog entry for that. Also, we can regularly eat food with fluoride, so that we won't need it in our toothpaste. 

According to the U.S. Department of Agriculture, these are several fruits that have some fluoride in them: 


  • Apple 
  • Avocado 
  • Banana 
  • Cantaloupe 
  • Cherries 
  • Grapefruit 
  • Peaches 
  • Pears 
  • Plums 
  • Strawberries 
  • Watermelon

Bananas are mainstays in our diet, while we also eat avocados, watermelon, and strawberries, when they are in season and less expensive. 

Practical Solutions to Dental Frustrations
Remineralize your teeth in the most natural and practical way by making your own remineralizing toothpaste. Free yourself from the expenses of tooth extraction, pasta filling, or worse, root canal because of cavities!

The solution to some of your dental frustrations is waiting to be made.

Add that frugal homemade toothpaste that heals teeth cavities in your life. And let's face the world with less chipped smiles. 


Have you tried making your own remineralizing toothpaste? How was the experience? How long did it take to cure your dental cavity?

Saturday, October 12, 2013

The Green DIY Mama's Materials Checklist

Turning green, or pursuing an alternative lifestyle using eco-friendly, natural products, is not entirely inexpensive, as I already talked about in "The High Price of Natural Beauty in The Philippines." Apparently, being a green DIY mama (papa/person) is not as frugal now as it used to be in olden times when commercial brands were not yet existent and people can make their own oils from their gardens.

To help you out, I prepared a checklist of materials to help parents or people like me who want to invest on natural materials for their homemade products. This list is especially cut out for those who live in the Philippines or countries where some of the natural ingredients used in Western DIY or homemade-centered websites are not available locally.

Baking soda, for instance, is not a locally-available product and bulk amounts are not accessible in the Philippines, or at least where I live, which is Metro Manila. Buying small boxes of baking soda may be expensive for those who cannot fully adapt to using it for many health and beauty uses. Witch hazel is an imported product too, as well as cocoa butter and beeswax pastilles. Again, they're expensive when their U.S. dollar prices are converted to Philippine peso.

Nevertheless, despite these expensive natural materials, I've been doing some computations and I realized, that, though the initial expenses for the investment in natural products are expensive, I can still save money in the long run as long as I stick to local products or make some of them on my own. 

Furthermore, nothing beats the satisfaction of knowing that I'm making safer, natural, healthier, homemade products for my family, especially my kids, such as the DEET-free Homemade Natural Bug Repellent Spray that are safe for babies. Homemade products do not have artificial preservatives and coloring that other commercial brands have, which make them the best everyday products for me and my family.

Right now, I'm following homemade recipes from Wellness Mama, Simple Mom, and Crunchy Betty, among others, making some variations along the way, because local products are different from Western ones and I can't always buy or access some of their materials. 

A Checklist of Natural Ingredients for Different Homemade Products

At present, I've invested on the following products, while some of them are already staple kitchen products:

Some natural ingredients for many DIY products that will replace commercial brands
  1. Baking soda
  2. Brown sugar
  3. Apple cider vinegar
  4. White sugar
  5. Raw honey
  6. Virgin coconut oil
  7. Castile soap
  8. Calcium tablets 
  9. Bentonite clay
  10. Witch hazel 
  11. Vitamin E oil
  12. Essential oils: Lavender, eucalyptus, peppermint, and tea tree
I spent around Php 4,000 for these materials. I bought my essential oils from Casa de Lorenzo, and the rest are from supermarkets and Healthy Options at SM Mall of Asia (my source of Castile Soap, Bentonite Clay, Witch Hazel, and Vitamin E oil).

I just learned that you can buy very cheap baking soda from Divisoria at Tabora Street. Only Php 25 to Php 30 per kilo! 

The following below are the rest of the materials that I plan to buy. I'm hoping I can get them from local stores, before finally buying from an online site that sells imported products, Galleon. The products below are for making natural deodorants, lotions, beauty products, and several other DIY natural products.

  1. 100% raw cocoa butter
  2. Beeswax pastilles
  3. Arrowroot powder
  4. Beetroot powder
These products can reach Php 5000 to Php 6500 depending on the amount and brands.

Transition to Green DIY Living

Being a green DIY mama doesn't have to be expensive or difficult, but there is a transition stage. Transitioning includes believing in these products and being aware that they take time to make and getting used to. 

In addition, the transition stage also means being aware of some of the essential oils and materials that you may be allergic too (or your kids and other family members) and taking note of pregnancy, because not all essential oils are safe for pregnant people. 

Transitioning also includes preparing the mindset and changing the habits of our family members who are used to manufactured products and who, sometimes, believe in these products laden with toxic materials more than our own homemade natural products.

Also, we have to be aware of the time involved in homemade DIY living. Some of our homemade products are as easy as two general steps, (i.e. Baking soda soak for curing/preventing rashes for babies and kids), while others may take ten minutes or so, depending on the amount of product you intend to make and if you're making some of the natural ingredients yourself. This means that DIY is "effort-full" too because every minute preparing them adds up.

These transitions can be quite emotionally and time-management difficult at first, but we must not give up. Who else will champion natural DIY living if not us?

The Life of a DIY Natural-Living Mama
It will be almost two months since I've ventured into the green, DIY world of natural living. So far, it's been an exciting and mind-expanding experience. 

My creativity and resourcefulness are tested, as well as my time-management skills, because I'm blogging about it, while doing my usual research work and family duties.

It helps that I have an eldest five-year old daughter who supports me in some of my DIY tasks and a husband who is also supportive, but who have yet to embrace the natural scents and texture (literally and figuratively) of health and beauty that he's not used to.

All in all, I'm so happy in finding new knowledge and developing new skills by doing DIY natural products. Hopefully, I can contribute more directly to it by finding local alternatives to imported natural ingredients.

My first love has always been God and my family, and writing and DIY natural living are tied in the second spot.

I hope this journey to a green, DIY lifestyle becomes as satisfying and energizing as yours. 

How is your pursuit of DIY natural living? Do you also find it overwhelming, but satisfying?


Friday, October 4, 2013

Five Simple, Natural Homemade Facial and Body Scrubs for Men and Women

Break that dull, uneven-toned skin without breaking the bank!

Rejuvenate your skin through trying any of these five inexpensive, natural, easy-to-make homemade scrubs. 

Whether you have oily, dry, or mixed/combination dry-oily face, exfoliating once or twice a week can do wonders in reducing breakouts and giving you soft, smooth skin that glows like summer.

Why Exfoliate? Some Beautiful Benefits

Facial and body scrubs are great ways to exfoliate the skin. But why exfoliate? 

Skin cleansing has evident benefits of removing dirt, while exfoliating has some additional advantages too. Exfoliating once or twice a week can enhance the results of your skin care routine by deeply cleaning your skin. 

Exfoliation removes dry skin by scrubbing out dead skin cells from the epidermis. Without these dead cells, your skin will feel refreshed and cleaned. 

You need to prevent clogged pores through regular (NOT daily) exfoliation because blocked pores can cause some of the most hateful skin problems- acne, whiteheads, and blackheads.

Clogged pores can also make your pore size bigger. You can lessen the size of your pores through exfoliation.

Furthermore, removing dead skin cells can hasten the process of skin renewal, helping your skin replace dull cells with healthy new skin. Skin renewal can ease the formation of fine lines and wrinkles, as well as prevent skin discoloration too.

These benefits are not just for women, they're good enough reasons for men to exfoliate too. 

Five Natural, Simple Homemade Scrubs

There are numerous natural homemade scrubs, but these are the ones I've tried so far and they all worked well with my mixed dry-oily, sensitive skin. They are practical because you can usually find the ingredients in your kitchen. They are also safe because they come from natural ingredients. 

Virgin Coconut Oil Sugar Scrub


coconut oil homemad scrub natural effective
Virgin coconut oil is good for the skin because of its moisturizing, antifungal, and antibacterial properties. Like sugar, it can lighten age spots and skin discoloration. Virgin coconut oil can also help infected skin heal faster.


Sugar naturally exfoliates the skin. It has Alpha-Hydroxy that can help produce glowing skin. Repeated use of sugar scrubs can result to healthier and uniformly textured and colored skin.

Ingredients

  • 2 parts (example, two teaspoons) of brown or white sugar
  • 1 part of virgin coconut oil
  • Optional: 1/2 teaspoon of Vitamin E oil

Instructions

  1. Mix 2 parts of sugar (regular white or brown sugar) with 1 part of coconut oil (you can also use almond and olive oil). Add Vitamin E oil if using. 
  2. Scrub gently on your face. You can also use this as a body scrub.
  3. Rinse thoroughly. I noticed that warm water rinses it better, though cold water would do.
Note: Using natural oils might seem oily at first after washing them with water, but after patting your skin dry, what's left is non-oily soft skin.

Olive Oil Oatmeal Scrub

This recipe is based on the oatmeal scrub of Jennifer Nelson of Mother Nature Network.


oatmeal scrub homemade effective oily skin heal acne prevent easy natural
Oatmeal has avenanthramides, which are antioxidant and anti-inflammatory compounds that heal itchy, dry and irritated skin. Oatmeal can do wonders for acne-prone skin because it can absorb extra oil from the skin.


olive oil skin scrub good for the skin anti-aging
Olive oil has four different antioxidants, which can help "neutralize damaging free radicals that can lead to skin aging and skin cancer.

Ingredients

  • 1/2 cup of ground, uncooked oatmeal
  • 1/2 cup of olive oil
  • 1/2 cup of sea salt

Instructions

  1. Mix oatmeal, olive oil, and sea salt.
  2. Use as facial and body scrub.
  3. Rinse thoroughly.

Coffee Grounds Scrub

honey scrub homemade natural DIY good skin beautiful smooth clean soft anti-acne
Honey is a natural moisturizer. It can also prevent acne and reduce wrinkles.
coffee scrub exfoliant natural homemade beauty
Coffee scrubs can naturally exfoliate skin.

Ingredients

  • 2 parts of coffee grounds
  • 1 part of virgin coconut oil
  • 1/2 teaspoon raw honey

Instructions

  1. Mix coffee grounds, oil, and honey until well-blended.
  2. Use as facial and body scrub.
  3. Rinse thoroughly.

Vanilla Brown Sugar Scrub


This recipe is from Wellness Mama.


Vanilla extract can help your skin feel smooth and soft.


Ingredients

  • 1 cup brown sugar
  • 1/2 cup almond oil
  • 1 teaspoon real vanilla extract
  • 1/2 teaspoon Vitamin E oil

    Instructions
    1. Mix sugar, oil, vanilla extract, and Vitamin E oil.
    2. Use as facial and body scrub.
    3. Rinse thoroughly.

    Vanilla Lavender Relaxing Facial Scrub

    This recipe is from Wellness Mama.

    Ingredients

    • 1 cup white sugar
    • 1/2 cup almond oil
    • 1/2 tsp Vitamin E oil
    • 1/2 tsp real vanilla extract
    • 15 drops lavender essential oil

    Instructions

    1. Mix sugar, almond oil, vanilla extract, and Vitamin E oil.
    2. Add lavender drops.
    3. Use as facial and body scrub.
    4. Rinse thoroughly.

    Expiration Date

    Because of the oils in these recipes, these homemade scrubs can last on the counter (dry location and far from sunlight) for two months, sometimes even less depending on the weather/climate of your location. You can make smaller batches if you want them fresh every time you use them.

    Scrubbed Goodness

    These homemade scrubs are so natural that you can even eat them, but of course, don't do it! Save it for your skin, so that you can save your bellies!

    These are just some of the natural, simple homemade scrubs we can make at home using basic food materials. They are great exfoliators for men and women with different skin types. 

    Reminders: Every skin is different, so you have to test what is best for your skin. You can manipulate the ratio of the ingredients until you find out the best natural homemade scrub recipe for your delicate skin. You can also try different natural ingredients. Also, be mindful of your allergies, and if you're pregnant, make sure you avoid essential oils that are not good for you and your baby.

    What's your favorite homemade scrub?